These buttermilk cheese scones are flavored with all the flavors of a garlic naan! They are soft and buttery with hundreds of flaky layers and are a speckled with garlic and chili. These scones taste so delicious with a smear of cilantro chutney and a cup of chai! You are going to love this recipe!

Flavors in these buttermilk cheese scones
The flavors in these buttermilk cheese scones are derived from my love for garlic naan! I use both garlic powder and fresh garlic in this recipe, to double up the garlic flavor. The scones are studded with little bits of spicy green chili, green onions and cilantro that add a vibrant and savory flavor. The cheddar cheese adds a nice touch of saltiness and brings out the flavors of the chili and garlic. The tangy buttermilk produces a soft and fluffy interior while the delicious salted butter produces a flakey crust with all those layers!
As if the scones weren't flavorful already, I like to brush them with garlic butter after they have baked. I then top them with more cilantro and nigella seeds for that classic garlic naan look (and flavor combination). Doesn't that sound divine?

How to make light and flaky scones
These are some of my best tips to make uniformly rise, tender and flakey scones. Follow these tips and you are guaranteed to get amazing results!
- Really cold fat: Cold butter is what creates flakey layers and pockets. When the little pieces of butter melt as the biscuits bake, they release steam and create little pockets of air, which makes the scones airy and flaky on the inside while remaining crisp on the outside.
- Grate your fat: Our goal is to incorporate tiny pieces of cold butter into the dry mixture to create the flakiest scones. Instead of using a biscuit cutter or food processor, I prefer grating the frozen butter before mixing it into the dry mix. It helps distribute the butter evenly and creates uniformly risen, flakey scones.
- Buttermilk: Buttermilk creates the most tender scones. The acid in the buttermilk reacts with the baking soda, helping the scones rise beautifully while baking.
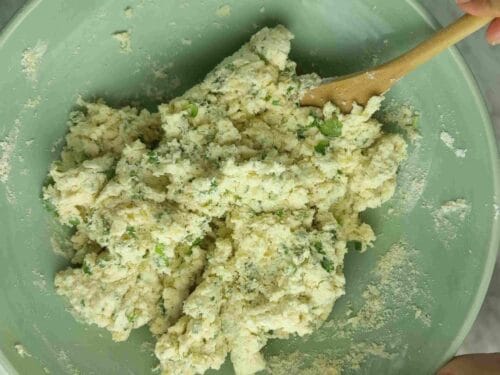
- Don’t over mix: Be careful to not overwork the scone dough. Over-handling scone dough will result in tough, hard, and flat scones. Mix the ingredients together ONLY until combined. Dough will be crumbly and cracks on the surface are fine. Scones should be rustic looking.
- Flatten & fold: This step is the most important and creates all those flakey layers (similar to croissants). More information below.
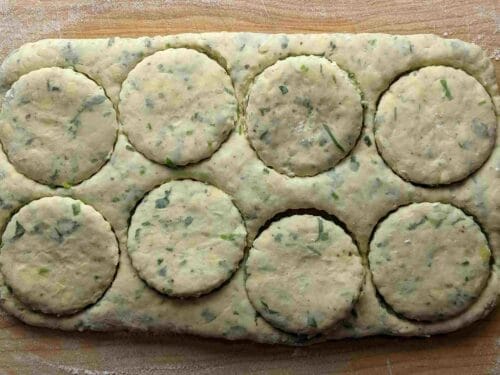
- Don’t Twist the Cutter: When cutting the dough, do not twist your cutter. Instead, press the cutter down into the dough firmly. Twisting the cutter will seal off the edges, preventing the scones from rising.

How to fold scone dough
Flattening and folding scone dough creates multiple flaky layers (similar to croissants). This step doesn't take long and results in the flakiest scones.
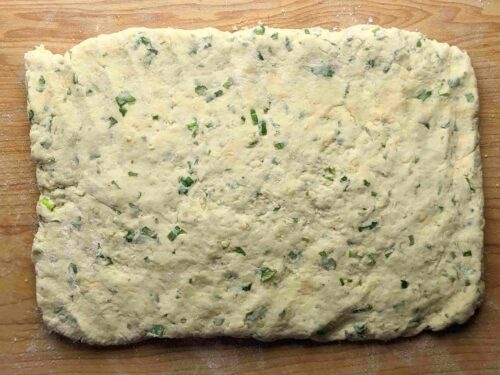
First, gather the dough and transfer it to a floured surface. Either pat or roll the dough into a rectangle:
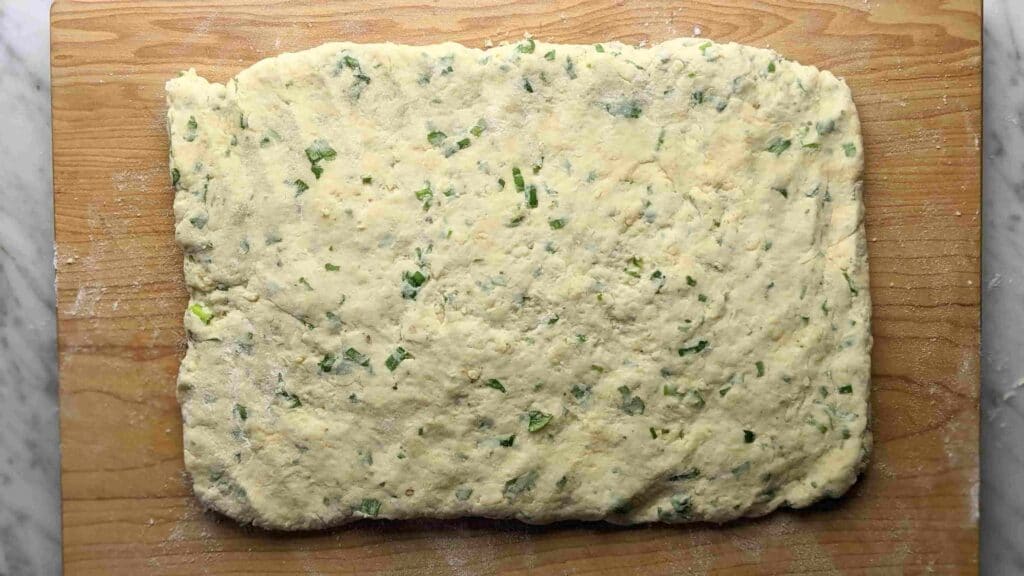
Then fold one side into the center.
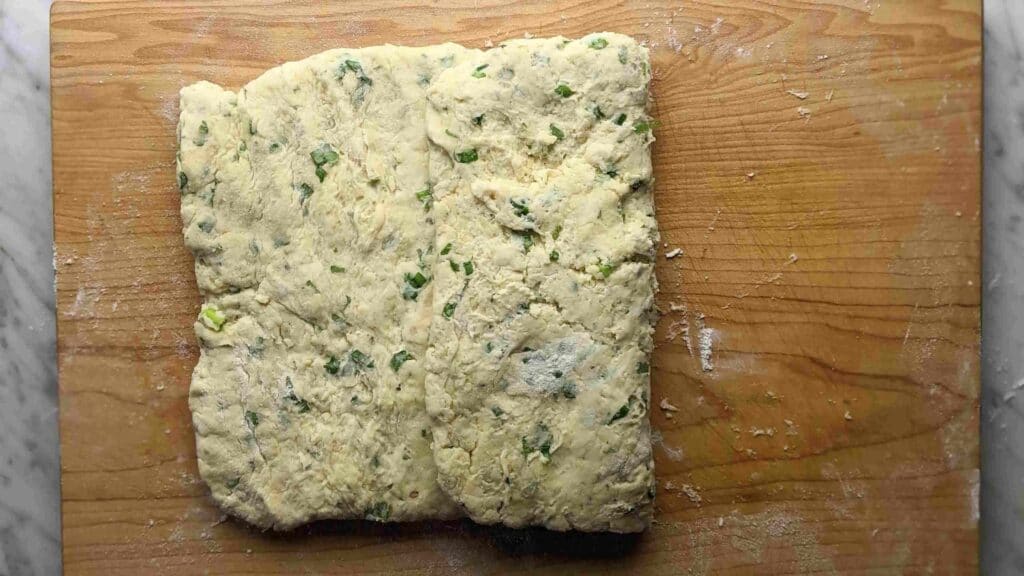
Now fold the other side onto the center.
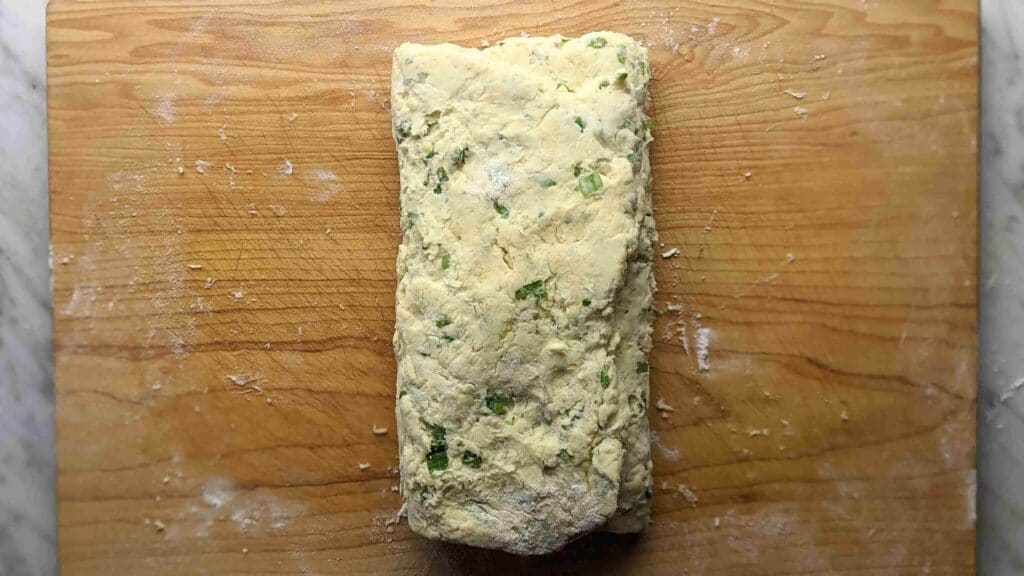
Finally, turn the folded dough horizontally and gently flatten it again. Repeat this folding process 2 more times.
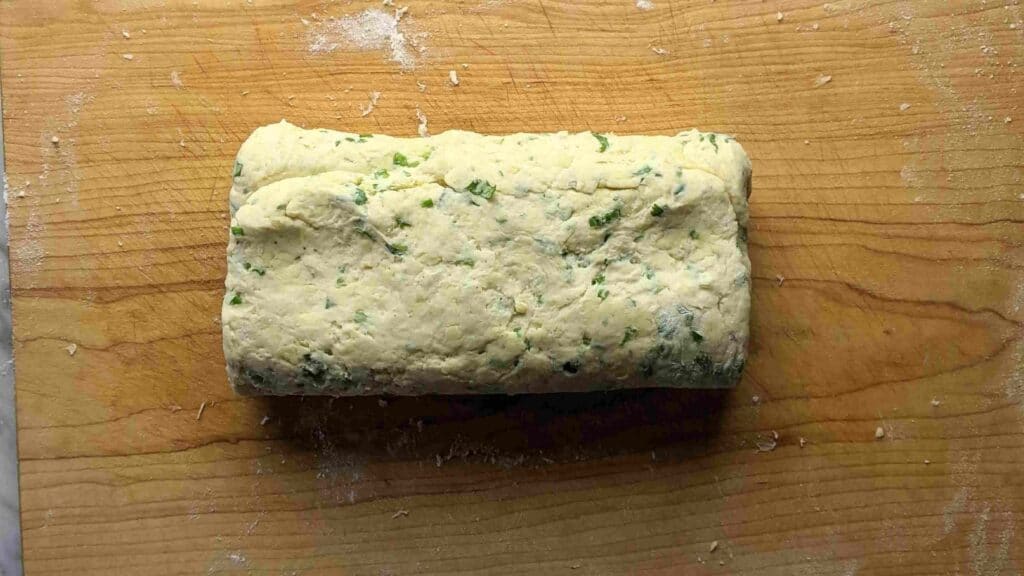
The dough should be about ¾ inch thick and the scones will rise as they bake.
Air frying v/s baking
Both air frying and baking produce amazingly flakey scones that are tender on the inside and crunchy on the outside.
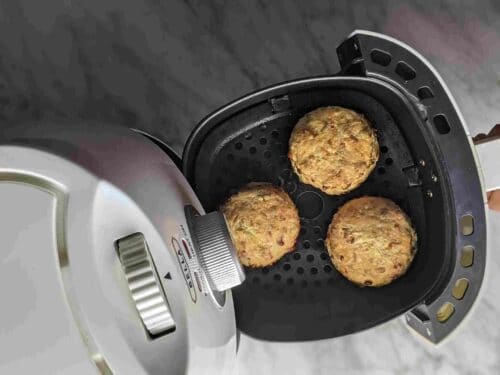
- Air fryer: Air fried scones turns out really delicious and the biggest advantage of this method is that it takes about half the time to cook compared to the oven method. However, most air fryers are small and this method will work well only if you are making a small batch of buttermilk cheese scones. I love this method when I only want to make a couple of scones and save the rest in the fridge/freezer. This way, I can have freshly baked scones at a moment's notice.
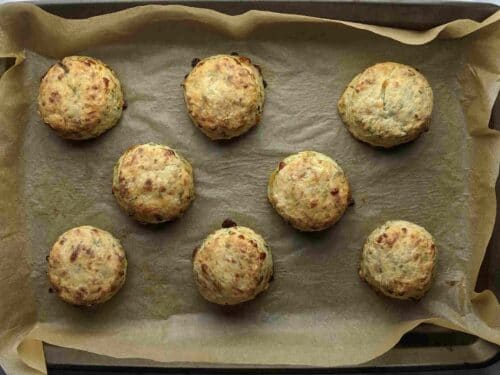
- Oven: This is the way to go if you're making these buttermilk cheese scones for a crowd. You can make a huge batch at once using multiple baking trays and they will all be perfectly flakey and ready at the same time!

Frequently asked questions
What is the secret to making good scones?
There's a few secrets to making light and flakey scones. Using cold fat, cold buttermilk, not overworking the dough and flattening and folding it will help you achieve amazing results. You can read more about these steps above.
How do I get my scones to rise and be fluffy?
Using the right amount of leavening agents (make sure they are unexpired) and making sure the oven is at the right temperature will help the scones rise evenly and be fluffy on the inside.
Why are my scones heavy?
Overworking the dough will lead to scones that are tough and chewy, rather than light and flaky. The key is to use a light hand and work the dough until it just comes together. The dough will be crumbly and cracks on the surface are fine. Scones should be rustic looking.
How long do homemade scones last?
Since these scones have cheese, they need to be refrigerated when they are completely cool and can be stored in the refrigerator for 5 days.
How do you store homemade scones?
Store these scones in an airtight container either in the refrigerator for up to 5 days or in the freezer for up to 3 months.
Can I freeze these scones for later?
Yes, scones can be frozen both before and after baking!
Baked scones freeze well for up to 3 months. Thaw at room temperature or in the refrigerator and warm up to your liking before serving.
To freeze before baking, cover the scones and flask freeze them for bout 3-4 hours. Then transfer them into a freezer safe bag/box and freeze them for up to 3 months. To bake, thaw them overnight in the refrigerator and then bake. (I've found that sometimes frozen scones can turn gray due to oxidization. The dough is still safe to consume but might not look very appealing).
Can I flavor these scones differently!
Absolutely! You could use any flavor combination that you like. Add in chili powder or ground spices and herbs for a savory scone or add in sugar/honey and extracts for sweet scones!

Some delicious recipes to serve with these scones!
Recipe

Buttermilk cheese scones with garlic and chili
Equipment
Ingredients
- 2 cups all-purpose flour
- ½ cup salted butter frozen for 30 minutes
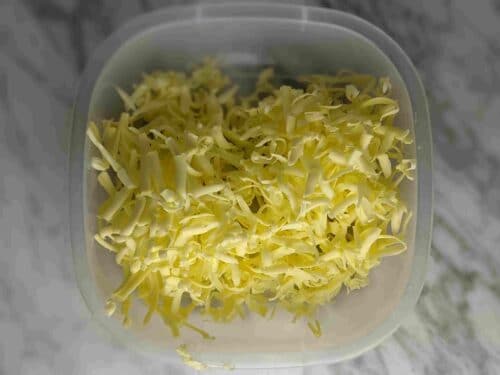
- 1 cup shredded cheddar cheese
- ½ teaspoon kosher salt
- 1 teaspoon sugar
- ½ teaspoon baking soda
- 2 teaspoons baking powder (aluminum free)
- ½ teaspoon garlic powder
- ½ teaspoon freshly ground black pepper
- 4 spicy green chilies (Thai green peppers) finely minced
- ¼ cup finely chopped cilantro
- ¼ cup green onions finely chopped
- 1 cup buttermilk chilled in the refrigerator, see notes
For brushing on top
- 1 tablespoon butter melted
- 2 teaspoons garlic finely minced
- 1 teaspoon finely chopped cilantro
- ½ teaspoon nigella seeds optional
Instructions
- Start by grating the frozen butter on the coarse side of a cheese grater. This will help incorporate the butter quickly and easily.
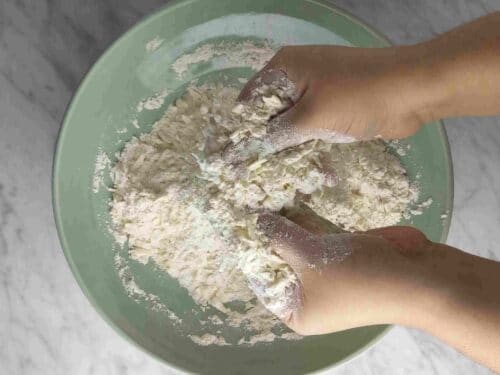
- In a large bowl, mix together the flour, sugar, baking powder, baking soda, garlic powder, black pepper and salt. Add the grated butter and using your fingertips, swiftly rub the flour and butter together to form a fine, breadcrumb-like texture.
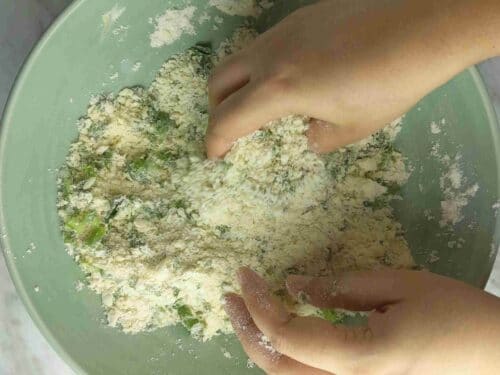
- Add the chili, cilantro, green onions and cheese. Mix together.
- Next, pour in the buttermilk. Use a spoon to bring the mixture together as a soft dough. Be very gentle and do not knead it. Light and flaky scones require as little handling as possible.
- Flour your hands and work surface. Transfer the dough onto the floured surface and pat or roll the dough out to a thickness of about ¾ inches. Fold one side into the center, then the other side. Now, turn the dough horizontally and again gently flatten into a ¾ inch thick rectangle. Repeat this process 2 more times (total of 3 times), so you end up with a ¾ inch thick rectangle.
- Stamp out rounds using a cookie cutter/glass with thin edges. Pick up any scraps of dough and bring them back together to cut out more rounds. Remember to handle the dough quickly and with a light touch. Cracks on the surface are fine. Scones should be rustic looking.
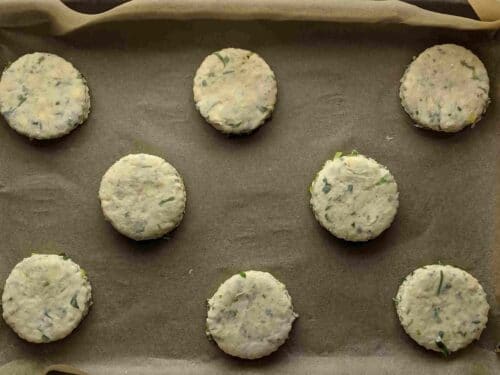
- Place the scones on a large baking tray lined with baking parchment. Arrange the scones on the tray, leaving a small gap around each one as they will rise a bit. Refrigerate for 15 minutes.
Oven instructions:
- Preheat the oven to 200°C/400°F.
- Bake the scones in the pre-heated oven for 18-20 minutes or until the tops are golden brown.
Air fryer instructions:
- Preheat the air fryer to 165°C/330°F.
- Place the scones in a single layer in the air fryer and cook them for about 9-12 minutes or until the tops are golden brown and they are puffed up.
Finishing the scones:
- Mix together the melted butter with the garlic and cilantro and brush the tops of the baked scones with the butter. Sprinkle some nigella seeds on top. Allow to cool for 15-20 minutes before eating.









Kalyani Krishnamurthy says
Looks lovely, Viola. I'd love to try this out soon.
Viola says
Thank you Kalyani, can't wait to hear what you think!
Cyrus says
Borrowed my friend's Air Fryer and tried this recipe out. You made my day! I wanted to store the scones as per your detailed instructions but they did not last very long ! Bomb recipe 😛
Viola says
So happy to know you liked my recipe!